

Key Takeaways
A vacuum leak can be small but still disrupt idle quality, fuel control, and drivability. A methodical Audi vacuum leak detection process helps separate a genuine intake leak from related sensor, exhaust, or boost problems.
- Check symptoms and scan data before replacing parts.
- Inspect PCV components, breather hoses, seals, and vacuum connections carefully.
- Use a low-pressure smoke test to reveal leaks that are difficult to see.
- Compare fuel trims at idle and higher engine speed.
- Repair the failed component, then clear faults and verify the result on a road test.
Understanding Audi vacuum leaks and their symptoms
An intake or vacuum leak allows air to enter the engine after the airflow measurement point. Because that air was not included in the original fuel calculation, the mixture may become lean and the engine control system has to compensate. The symptoms often appear first at idle, when even a modest leak has a noticeable effect.
How unmetered air affects engine performance
When unmetered air reaches the intake manifold, combustion can become inconsistent. The engine may idle unevenly, hesitate when the throttle opens, or require additional fuel correction to maintain the target mixture. A useful general explanation of this relationship is available in this guide to diagnosing intake leaks, which also outlines why smoke testing can be cleaner than using flammable sprays.
The effect depends on the size and location of the opening. A leak close to the manifold can influence several cylinders, while a leak near one runner may produce a more localized roughness. Do not assume that every lean condition proves a hose is split; air metering, fuel delivery, ignition, and exhaust measurement can create similar symptoms.
Warning signs at idle, under load, and during acceleration
A rough or wandering idle is a common starting point because the engine has little airflow margin at closed throttle. You may also notice a delayed response when pulling away, a stumble during light acceleration, or an occasional stall when coming to a stop. Under load, the symptom can become less obvious if the leak represents a smaller proportion of total engine airflow.
Listen for a faint hiss around the intake tract, but do not rely on sound alone. Plastic fittings can crack underneath, and a hose may seal when cold but open as the engine moves or warms. A change in fuel economy or repeated check-engine illumination is another reason to test rather than guess.
Fault codes commonly linked to intake leaks
A lean-system fault such as P0171 can accompany an intake leak, particularly when the control unit sees that it is adding fuel beyond its normal correction range. Misfire codes may also appear if the mixture becomes unstable, although misfires have many other causes. The code identifies a condition, not automatically the failed part.
Record freeze-frame information before clearing anything. Engine speed, coolant temperature, load, and fuel trims at the moment the fault occurred can show whether the problem is strongest at idle or during operation. That context helps decide whether to begin with vacuum hoses, the PCV system, fuel checks, or ignition testing.
Differences between vacuum leaks and boost leaks
A vacuum leak generally affects the intake side when the engine is drawing air under negative manifold pressure. A boost leak occurs in a pressurised section, often becoming more apparent when a turbocharged engine is producing positive pressure. The two can share symptoms, but the test setup and sealing points are not identical.
A smoke test for an intake vacuum leak should not be treated as a substitute for a correctly regulated pressure test of the charge-air system. Follow the air path from the filter to the throttle body, then consider which portions are under vacuum or boost at the time the symptom appears.
Preparing for an Audi vacuum leak diagnosis
Good preparation keeps the diagnosis focused and reduces the temptation to replace several parts at once. Begin with a cool or safely managed engine, a clean work area, and a record of stored codes and live data. Then inspect the system in a logical order before connecting test equipment.
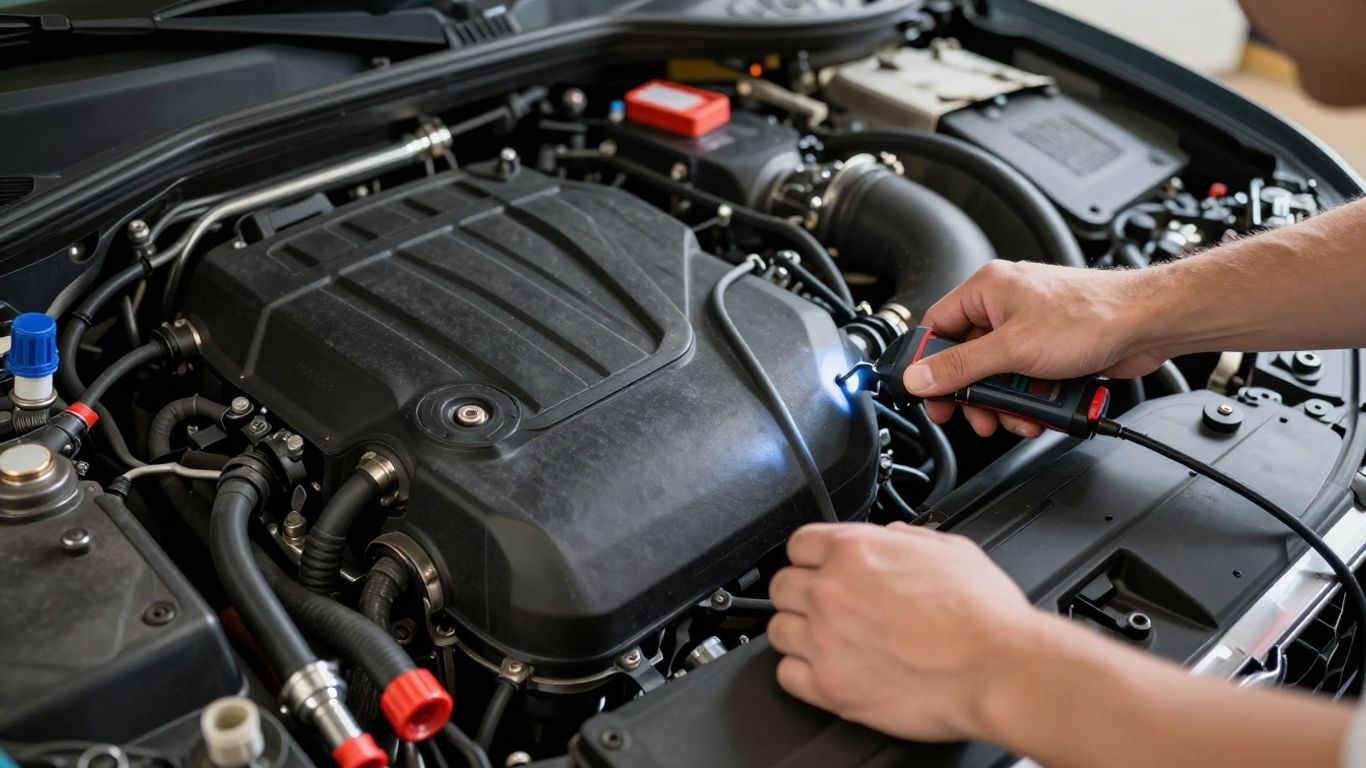
Tools for visual, smoke, and pressure testing
A bright inspection light, inspection mirror, basic hand tools, scan tool, and suitable hose plugs cover much of the initial work. A pressure-regulated smoke machine is useful for finding small openings, while a regulated pressure tester may be needed for boost-side plumbing. Avoid introducing uncontrolled pressure into an intake or crankcase system.
Keep replacement caps and temporary plugs available so open ports do not create misleading results. A service diagram or parts catalogue for the exact engine code is also valuable, since hose routing and valve arrangements vary between models and model years.
Audi-specific components to inspect first
Start with the components that commonly sit between the measured airflow and the intake ports: the intake boot, PCV or crankcase ventilation plumbing, vacuum tees, check valves, manifold connections, and throttle-body sealing surface. Look for oil staining, brittle plastic, collapsed hose walls, and clamps that no longer hold evenly.
Do not pull forcefully on aged connectors. A fitting that appears intact can break during inspection, turning a diagnostic visit into an additional repair. Photograph hose routing before removal, particularly when several lines run close together.
Safety precautions around hot engines and flammable fluids
Keep hands, clothing, and test leads away from belts, fans, pulleys, and hot exhaust parts. Work in a ventilated area and avoid using combustible sprays as a first-choice leak test. If a smoke machine uses heat to generate smoke, follow its operating instructions and keep it away from spilled fuel or solvent.
The brake booster circuit deserves extra care because it relates to braking assistance as well as engine vacuum. If the pedal feels unusually hard, stop driving and have the braking system assessed rather than treating the issue as an ordinary drivability fault.
When scan data can narrow the search
Scan data is most useful when it is collected before and during a controlled test. Short-term and long-term fuel trims, oxygen-sensor feedback, manifold pressure, engine speed, and misfire counters can show whether the engine is correcting a mixture problem and under what conditions.
A scan tool cannot see a cracked hose directly, but it can tell you where to spend time. If trims are strongly positive at idle and improve with rpm, an intake-side leak becomes more plausible; if the pattern does not change, broaden the diagnosis.
Inspecting common Audi vacuum leak points
Once the basic readings are recorded, inspect the physical system from the air inlet toward the cylinder head. Take your time around connectors and seals because many leaks are hidden beneath covers or at the underside of a fitting. A clean inspection is often faster than repeatedly clearing codes and waiting for them to return.
PCV and crankcase ventilation system failures
The PCV or crankcase ventilation system can develop split diaphragms, hardened hoses, failed check valves, or damaged housings. A fault here may create a pronounced hiss, an unstable idle, unusual crankcase vacuum, or oil residue around a connection. Test the system according to the engine’s service procedure rather than blocking random lines.
If the system is integrated into a larger cover or separator assembly, inspect the complete assembly and its mating surfaces. Replacing only the most visible hose may leave the original failure in place.
Cracked breather hoses and vacuum lines
Small-bore vacuum lines often harden from heat and oil exposure. Bend each accessible section gently and inspect the ends, where clamps and connectors can cut into the rubber. Pay particular attention to tees and elbows because their shape puts stress on the wall.
A useful inspection sequence is:
- Trace each line from its source to its destination.
- Check both sides of every one-way valve.
- Inspect hidden bends beneath the intake duct.
- Confirm that unused ports are capped securely.
This sequence prevents a quick glance at the top of the engine from overlooking a lower connection. Replace damaged lines with material suitable for the temperature, oil exposure, and vacuum duty involved.
Intake manifold and throttle body seals
A manifold gasket can leak at one runner or along a broader mating surface. Look for uneven deposits, oil traces, loose fasteners, or evidence that the manifold has been disturbed previously. The throttle body also needs a clean, even sealing surface and the correct gasket or O-ring.
Do not use excessive sealant as a substitute for a proper gasket. Extra material can enter the intake, distort the joint, or make later service more difficult. Tighten fasteners in the specified sequence and torque pattern for the engine being repaired.
Brake booster and EVAP system connections
The brake booster hose, check valve, and grommet can admit air if they are cracked or poorly seated. EVAP purge connections can also affect intake vacuum when a valve, hose, or fitting fails. Because these systems may open under particular operating conditions, a visual inspection alone may not reproduce the fault.
Test each circuit without confusing an intentional valve opening with a leak. A second general reference on vacuum-system symptoms and inspection is available through this explanation of vacuum leak symptoms, but the vehicle-specific service information should guide final testing.
Using smoke testing to locate hidden leaks
Smoke testing is valuable because it turns an invisible air path into a visible plume. The engine is normally off during the test, and the intake system must be sealed in a controlled way. Low pressure matters: excessive pressure can move seals, damage components, or create a false picture of how the system behaves.
How to set up a smoke test correctly
Warm components should be allowed to cool enough for safe access, and the engine should be switched off. Seal the intake opening or use an appropriate access point, disconnect only what the test procedure requires, and regulate the smoke machine to the pressure recommended for the system.
Before filling the system, check that the machine itself is not leaking. A quick hose and plug inspection saves time and keeps smoke from appearing in places unrelated to the vehicle.
Where to introduce smoke into the intake system
The best entry point depends on the engine layout and which section you need to test. An intake duct or a suitable vacuum connection may expose the manifold, throttle body, PCV plumbing, and nearby seals, while a separate setup may be required for charge-air plumbing.
Isolate branches when necessary. If smoke is introduced upstream of an open throttle plate or valve, it may not reach every area you expect. Use approved adapters rather than forcing a hose over a fragile plastic fitting.
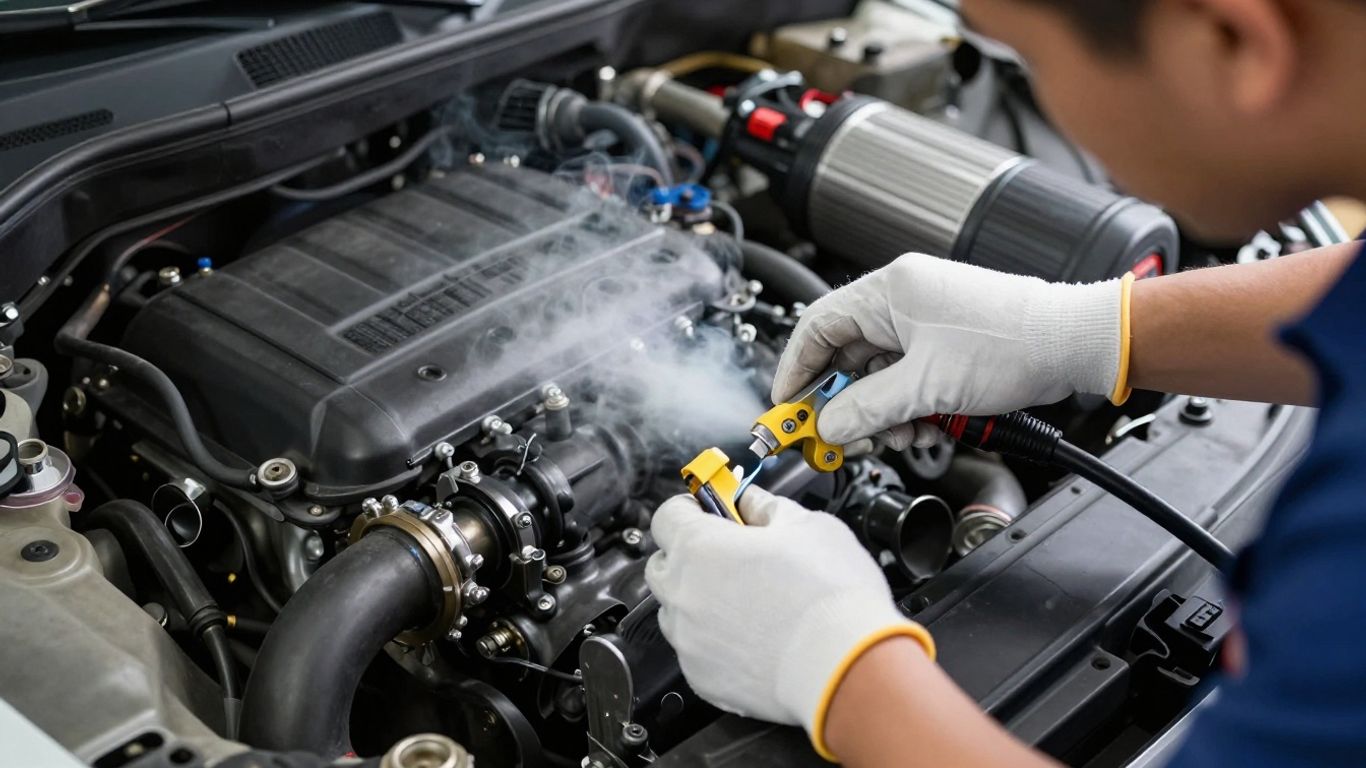
Reading smoke movement around seals and hoses
Watch slowly and use a bright light without placing your face near the suspected opening. Smoke that curls steadily from a gasket edge, hose split, injector seal, or connector is stronger evidence than a brief wisp caused by turbulence. Mark each confirmed leak before moving to the next area.
Some leaks appear only when a hose is flexed or a component is gently moved. Do this carefully and never disturb a hot, rotating, or electrically active component during the test.
Avoiding false results from open valves and disconnected lines
An open throttle, purge valve, or crankcase path can allow smoke to travel into areas that are not supposed to be sealed during that particular test. Disconnected lines can also vent smoke and look like a fault even when the connection was intentionally opened.
Write down which ports were capped and which valves were expected to pass smoke. If the result is unclear, restore the system to its normal configuration and repeat the test in smaller sections rather than increasing pressure.
Confirming leaks with scan data and live tests
A visible leak is compelling, but the strongest diagnosis connects that physical finding with engine data. Compare readings before the repair, during a repeat test, and after the system is restored. This is especially useful when several old hoses look tired but only one is causing the current fault.
Interpreting fuel trim readings at idle and higher rpm
Positive fuel trims mean the control system is adding fuel to correct a lean indication; negative trims mean it is removing fuel. A vacuum leak often has its greatest influence at idle because the unwanted air is a larger share of total airflow. As rpm rises and commanded airflow increases, the percentage effect may diminish.
Treat the pattern as a clue rather than a verdict. Fuel pressure, injector performance, airflow measurement, and exhaust leaks can produce similar numbers, so use trims alongside inspection and other tests.
Using fuel trims to distinguish vacuum and exhaust leaks
An exhaust leak before an oxygen sensor can draw in outside air and falsely suggest a lean mixture. That can resemble an intake leak in scan data, but it may be accompanied by exhaust noise, soot, or a location-specific sensor pattern. Inspect the exhaust side when the intake system passes its smoke test.
A vacuum leak usually affects the engine’s response to changes in rpm and load in a different way. Rechecking trims after temporarily isolating a suspected branch can help separate these possibilities, provided the isolation is safe and appropriate.
Checking manifold pressure and airflow readings
Manifold pressure should respond sensibly to throttle position, engine speed, and load. An airflow reading that appears inconsistent with the engine’s operating condition can point toward a sensor or air-path problem, but it should not be judged in isolation. Compare values with known-good service ranges for the exact engine.
During a controlled test, note whether the pressure stabilizes after a suspected leak is repaired. A restored reading is useful confirmation, especially when the original symptoms were intermittent.
Comparing misfire data across cylinders
Misfire counters can show whether the issue is widespread or concentrated near one intake runner. A single-cylinder pattern may direct attention toward a local gasket, injector seal, ignition component, or runner, while multiple cylinders suggest a shared air or fuel problem.
Resetting counters too early can erase useful evidence. Record them under the same operating conditions before and after the repair so the comparison has meaning.
Repairing and verifying an Audi vacuum leak
A repair is complete only when the cause is corrected and the original symptoms no longer return. Replace the failed seal, hose, valve, or housing with the correct part for the engine and verify that adjacent connections were not damaged during access. A tidy reassembly is part of the diagnosis, not an afterthought.
Choosing replacement hoses, gaskets, and PCV parts
Use parts that match the original application, including temperature resistance, diameter, flexibility, and valve direction. A generic hose may collapse under vacuum or soften when exposed to oil. Gaskets and O-rings should be new when their sealing surface has been disturbed unless the service procedure explicitly permits reuse.
Inspect the mating surfaces before installing anything. A replacement part cannot seal against a warped flange, damaged groove, or broken retaining clip.
Preventing new leaks during reassembly
Clean sealing surfaces without gouging plastic or aluminium, lubricate O-rings only when appropriate, and seat every connector until its lock engages. Route hoses away from sharp edges, exhaust heat, and moving linkages. Do not substitute a clamp where the original connection requires a formed fitting or retaining clip.
After reassembly, compare the hose routing with your reference photographs. A line that is connected to the wrong port can create a new drivability problem while appearing visually tidy.
Clearing fault codes and adapting engine controls
Save diagnostic information before clearing codes. Once the repair is complete, clear faults with the scan tool if appropriate and allow the engine control system to relearn under normal operating conditions. Some vehicles may need a specific adaptation or readiness procedure, so follow the service information for the exact model.
Do not judge success solely by the absence of an immediate warning light. Confirm fuel trims, idle quality, misfire counters, and the original symptom after the system has had time to run its checks.
Road-testing the vehicle after the repair
Begin with a stationary idle check, then drive through gentle acceleration, steady cruising, and the operating range in which the fault originally appeared. Watch live data where possible and listen for renewed hissing, hesitation, or abnormal brake-pedal feel. Stop if the engine runs dangerously poorly or braking assistance changes.
A final scan after the road test can show whether the fault remains pending or whether the control system is returning to normal correction. Keep a record of the repair and readings; it makes any future diagnosis much quicker.
Conclusion
Finding an intake leak is less about guessing the most familiar component and more about combining symptoms, scan data, careful inspection, and a controlled smoke test. Work from the measured airflow toward the intake, repair only confirmed faults, and verify the result under the conditions that first revealed the problem.
Frequently Asked Questions
What is the most common sign of a vacuum leak?
A rough or unstable idle is common, often accompanied by hesitation, a hissing sound, lean fuel-trim readings, or a check-engine light. These signs can have other causes, so testing is needed before replacing parts.
Can a vacuum leak cause a misfire?
Yes. Unmetered air can create a lean mixture that burns inconsistently, producing misfires in one or more cylinders. Ignition, injector, compression, and fuel-delivery faults can cause the same symptom.
Is smoke testing safe for an intake system?
A properly regulated low-pressure smoke test is generally suitable when the equipment and adapters are used correctly. Excessive pressure, poor sealing, or heat and fuel hazards can make testing unsafe.
Should the engine be running during a smoke test?
Most intake smoke tests are performed with the engine off so smoke can fill the sealed system and reveal escaping air. Live engine data is then used separately to confirm how the leak affected operation.
Can a vacuum leak reduce fuel economy?
It can. The engine may add fuel to compensate for unmetered air, and drivability problems may lead to inefficient operation. A change in fuel economy is not proof of a leak by itself.
How do vacuum leaks differ from boost leaks?
A vacuum leak affects an intake system operating under negative pressure, while a boost leak occurs in a pressurised charge-air section. Their symptoms can overlap, but each requires an appropriate test setup.
What should be checked after repairing a leak?
Confirm that all hoses, clamps, connectors, and seals are correctly installed. Then clear or record fault codes as appropriate, recheck fuel trims and misfires, and road-test the vehicle under the conditions that originally produced the complaint.