

Key Takeaways
An ignition coil turns the battery’s low voltage into the high voltage needed to fire a spark plug. When one begins to fail, the symptoms can range from a subtle hesitation to a serious misfire.
- Misfires, rough idle, hesitation, and loss of power can point to a weak coil.
- An OBD-II scan and a careful coil swap test can help identify the faulty cylinder.
- Correct fitment depends on the Audi model, engine, and replacement part number.
- A single-coil replacement often makes sense, although the condition of the remaining coils matters.
- Spark plugs, oil leaks, moisture, heat, and wiring should be checked before the repair is considered complete.
How the ignition coil system works in an Audi
An Audi ignition system is designed to deliver a precisely timed spark to each cylinder. The coil sits between the vehicle’s electrical system and the spark plug, converting relatively low battery voltage into the much higher voltage required for ignition. Understanding that simple path makes the later symptoms and diagnostic steps easier to follow.
The exact arrangement varies with the engine, but the basic job remains the same. A coil can be reliable for many miles, yet heat, vibration, contamination, or electrical faults may eventually weaken it. That is why a proper diagnosis is more useful than replacing parts based on a guess.
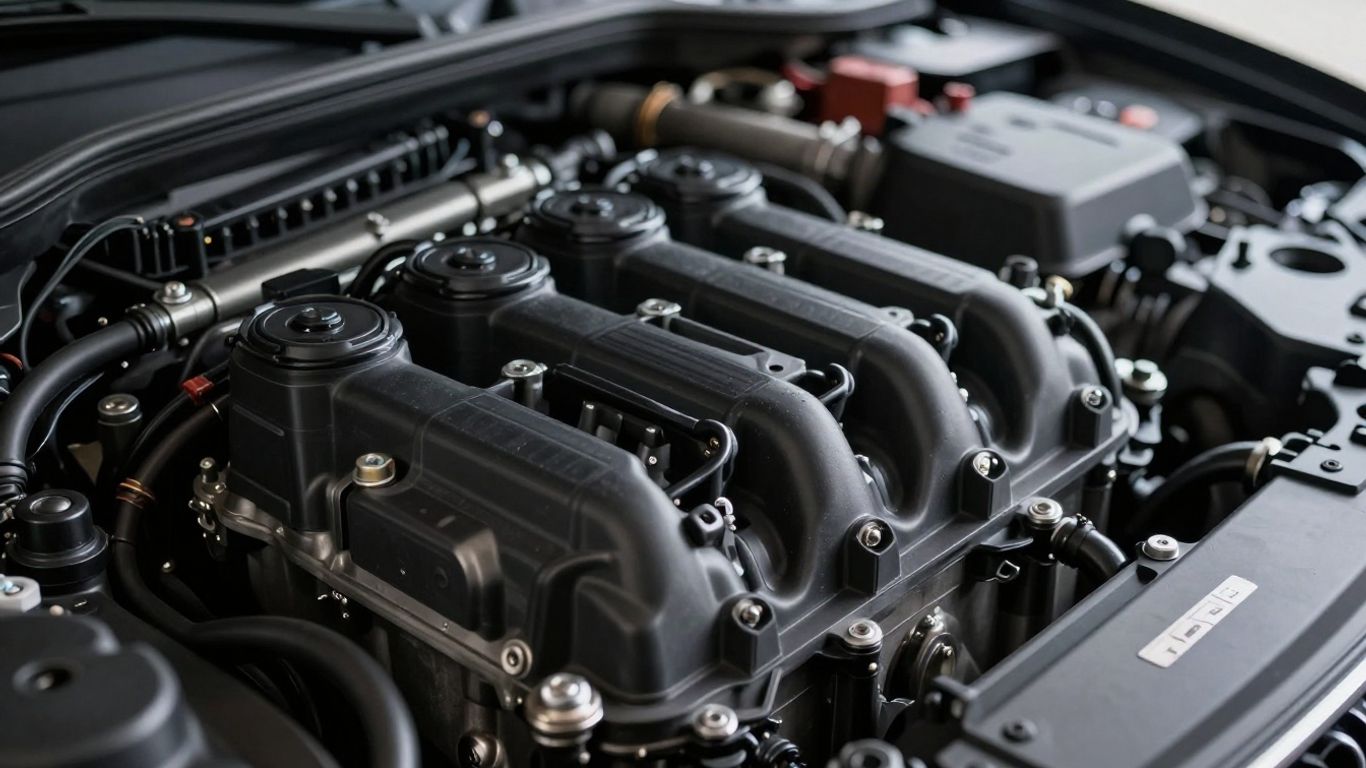
The role of ignition coils in engine performance
Each cylinder needs a strong spark at the right moment to burn its air-fuel mixture. If the spark is weak or inconsistent, combustion becomes uneven, and the engine may shake, hesitate, or set a misfire code. A coil problem can therefore feel like a broader engine issue even when the fault is limited to one component.
A healthy coil also supports smooth acceleration and stable idle. The engine control system may try to compensate for an intermittent problem, which can make the vehicle feel normal one moment and noticeably rough the next. A persistent misfire deserves prompt attention because unburned fuel can place extra stress on the emissions system.
How coil packs create spark for the plugs
The coil uses electromagnetic induction. Current flows through one winding, creating a magnetic field; when that current is interrupted, the collapsing field induces a much higher voltage in another winding. That voltage travels through the coil’s output connection to the spark plug, where it jumps the plug gap as a spark.
Many modern Audi engines use a coil-on-plug arrangement, with an individual coil mounted directly over each plug. This reduces the need for long high-voltage plug wires, but it also places the coils in a hot, tightly packed area. A failure in one unit can be intermittent, especially when the engine is cold or under load.
Common Audi engine layouts and coil locations
Coil location depends on the engine family and cylinder arrangement. Inline engines generally place the coils in a row along the top of the cylinder head, while V engines may position them in two banks. Plastic engine covers, intake plumbing, and other components can partially hide the connectors.
Before removing anything, consult the correct service information for the vehicle. Do not assume that two Audi models with similar displacement use the same access procedure or coil. The safest approach is to identify the engine code and photograph the original layout before disconnecting parts.
Why one failing coil can affect drivability
A single weak coil interrupts combustion in its cylinder, so the engine loses some of its smoothness and available power. The driver may notice a tremor at idle, a stumble during acceleration, or a sudden change in exhaust note. On a turbocharged engine, the problem can become more obvious when cylinder pressure rises under boost.
The engine computer may also reduce power to protect the engine and emissions components. A flashing warning light should be treated seriously, particularly if the vehicle is shaking or struggling to accelerate. A short drive to a repair facility may be appropriate, but continued hard driving is a poor way to test the problem.
Symptoms that indicate an ignition coil problem
Coil symptoms are not always dramatic at first. Some failures appear only after the engine warms up, while others show themselves during acceleration or wet weather. The pattern matters: a single-cylinder misfire, a repeatable hesitation, and a warning light together provide more useful information than any one symptom alone.
The following signs can also come from spark plugs, fuel delivery, air leaks, or compression problems. Treat them as clues rather than proof. An accurate Audi ignition coil replacement begins with identifying the cause of the misfire, not merely reacting to the first part that seems convenient.
Misfires, rough idling, and engine hesitation
A rough idle is one of the most recognizable signs. The engine may vibrate through the seat or steering wheel, and the tachometer may move slightly instead of holding steady. Hesitation when pulling away or climbing a hill can indicate that a coil is failing when the engine needs a stronger spark.
Intermittent misfires are especially frustrating because they may disappear after cycling the ignition. Note when the symptom occurs: cold start, hot restart, highway acceleration, or damp weather. That information can help separate a temperature-sensitive coil from a problem that is present under every operating condition.
Check engine light and diagnostic trouble codes
A malfunction indicator light may illuminate when the computer detects repeated misfires. Codes can identify a cylinder, such as a misfire on cylinder three, but the code does not automatically prove that the coil itself is defective. It tells you where the combustion problem was detected.
A flashing light generally indicates a more active misfire than a steady light. Avoid clearing codes before recording them, since freeze-frame data may show engine speed, temperature, and load at the moment the fault occurred. Those details are useful if the problem becomes intermittent.
Hard starting, stalling, and reduced power
A severely weak coil can make the engine difficult to start, particularly if several cylinders are affected or the failure occurs under demanding conditions. Stalling may follow, although fuel, crankshaft-position, and intake faults can produce similar behavior. Reduced power is often the vehicle’s protective response rather than a direct measure of coil condition.
If the engine starts and immediately runs badly, switch it off rather than repeatedly cranking it. Repeated attempts can drain the battery and make the original diagnosis harder. A tow or professional inspection is sensible when the car cannot maintain a stable idle.
How coil failure symptoms overlap with spark plug problems
Worn or fouled spark plugs can produce nearly the same symptoms as a bad coil. A plug with an excessive gap requires more voltage to fire, which can strain a marginal coil. Oil in the plug well can also interfere with the ignition connection and point to a separate sealing problem.
That overlap is why a visual inspection and a controlled test are valuable. If the plug is worn, replace it according to the correct specification rather than installing a coil and hoping the symptom disappears. The general causes and warning signs are also outlined in this ignition coil failure guide, which can provide useful background before testing.
Diagnosing a faulty Audi ignition coil
Diagnosis should move from simple observations to controlled tests. Start by recording the symptoms and scanning for codes, then inspect the affected area before swapping parts. This sequence limits unnecessary replacements and helps reveal problems that a new coil would not fix.
Work with the engine cool when inspecting components, and follow basic precautions around moving belts, hot surfaces, and electrical connectors. If the fault is severe or the vehicle cannot be driven safely, diagnostic work is better handled in a workshop.
Reading misfire codes with an OBD-II scanner
Connect a suitable OBD-II scanner and record stored, pending, and manufacturer-specific codes if the tool supports them. A cylinder-specific misfire code gives you a starting point, while random or multiple-cylinder codes suggest that the cause may be broader than one coil. Freeze-frame information can show whether the misfire happened at idle, during acceleration, or at a particular temperature.
Do not erase the codes until you have written them down. After repairs, clearing them may be useful, but only after the original evidence has been preserved. If the warning light returns quickly, the scan should be repeated rather than assuming the replacement part was defective.
Using the coil swap test to confirm a failure
A coil swap test moves the suspected coil to another cylinder, provided the design and service instructions allow it. Clear or record the original code, run the engine under the same conditions, and scan again. If the misfire follows the coil to its new cylinder, the coil becomes a strong suspect.
This is not a perfect test for every fault. A loose connector, damaged wiring, or a plug problem can remain with the original cylinder and confuse the result. Keep track of each coil’s original position, and do not continue driving if the engine is misfiring heavily.
Inspecting spark plugs, wiring, and connectors
Remove the relevant coil only after releasing its connector correctly. Look for cracked insulation, bent terminals, corrosion, oil in the plug well, water, and signs of arcing. The spark plug should be checked for wear, fouling, damage, and an appropriate gap.
A visual check is quick, but it should be deliberate. These four observations are particularly useful during the inspection:
- Oil or moisture around the coil boot or plug well.
- Green corrosion, looseness, or damage at the electrical connector.
- Cracks, carbon tracking, or burn marks on the coil and boot.
- A worn, fouled, or damaged spark plug.
After the inspection, compare the findings with the scan results and the coil swap test. A new coil will not correct a damaged connector or an oil leak, so the surrounding fault must be addressed as well.
When professional diagnostic testing is the better choice
Professional help is worthwhile when several cylinders misfire, compression may be low, or the warning light flashes repeatedly. A shop can test power and ground circuits, examine live data, perform compression or leak-down testing, and check for fuel or air-delivery faults. Those steps become more valuable when swapping coils does not move the misfire.
Specialists can also confirm whether a software update, wiring repair, or less obvious mechanical issue is involved. If you are comparing repair methods, a structured SaaS idea validation guide is obviously not a substitute for vehicle testing; the useful principle here is simply to compare evidence before committing to a solution.
Choosing the right replacement ignition coil
The correct replacement is determined by fitment, not appearance. Coils that look nearly identical may have different electrical characteristics, connector designs, or mounting details. Use the vehicle identification number, engine code, and original part number whenever possible.
Quality matters, but the most expensive option is not automatically the right one. A correctly specified part from a reputable source, installed alongside healthy plugs and clean connections, is more important than a vague performance promise.
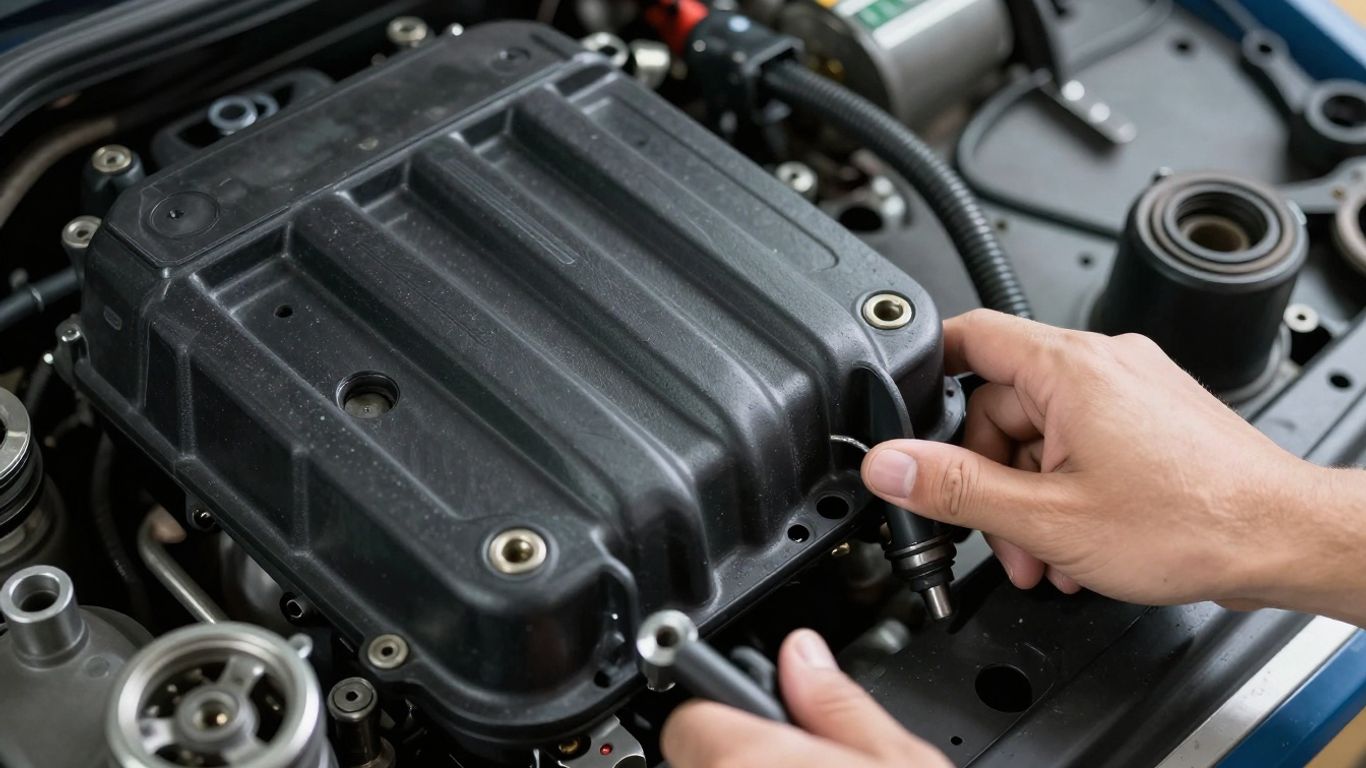
Matching the coil to the Audi model and engine
Start with the exact model year, engine, and production details. Some vehicles changed coil specifications during a model run, and the same model name can cover multiple engine families. Online catalogs can help, but verify the result against the original unit and the vehicle’s service information.
If the car has been modified, such as with a different engine control calibration, ask whether the ignition components still match the current setup. Avoid choosing a coil solely because it is listed for a similar-looking engine. Small fitment differences can prevent the connector from locking or the coil from seating correctly.
OEM, aftermarket, and performance coil options
An original-equipment replacement is often the simplest route because it follows the vehicle’s intended specification. Reputable aftermarket parts can also be suitable when the catalog fitment is exact and the manufacturer provides clear quality control. Be cautious of unsupported claims that a replacement coil will add power to an otherwise standard engine.
The same careful evaluation applies to other technical purchases. For example, a VoiSpark page concerns AI voiceovers and audio creation, not vehicle parts; it is unrelated to choosing a coil and should not be used as evidence for automotive performance. For this repair, the relevant evidence is fitment, warranty, construction, and documented compatibility.
Checking part numbers and fitment requirements
Compare the replacement part number with the number on the original coil, while allowing for superseded numbers that the manufacturer has officially replaced. Check connector shape, coil length, boot design, mounting features, and whether a separate seal or adapter is required.
A parts counter or repair shop can verify the number using the VIN. Keep the packaging until the coil has been installed and tested, since returning an incorrect part is easier when the identification label remains available.
Replacing one coil versus the full set
Replacing only the failed coil is reasonable when the other coils test correctly and have no visible damage. A full set may be considered when several coils have failed close together, the vehicle has high mileage, or access labor is substantial. The decision should reflect evidence and budget, not fear that every remaining coil will fail immediately.
Always consider the spark plugs at the same time. If they are overdue, replacing them can prevent a new coil from working against excessive plug wear. Keep the old working coils if they are serviceable and clearly label them, unless the repair facility recommends otherwise.
How to perform an Audi ignition coil replacement
The procedure is straightforward on many engines, but access varies considerably. Some coils are visible as soon as the engine cover is removed; others require additional components to be moved carefully. Use the correct service information for the exact vehicle and never force a connector or coil that does not release normally.
A clean workspace helps prevent dirt from entering the plug wells. Allow the engine to cool, park securely, and disconnect the battery only if the service instructions call for it. Keep fasteners organized because different lengths can damage components if returned to the wrong location.
Preparing the vehicle and gathering the right tools
Gather the replacement coil, any required seals, a socket set, a small ratchet, trim tools, a flashlight, and an OBD-II scanner. Depending on the engine, you may also need an extension, a torque wrench, and dielectric grease used only where the manufacturer specifies it. Do not improvise with tools that can damage plastic connectors.
Before starting, confirm that the replacement matches the old unit and that the engine is cool enough to touch safely. Photograph the coil layout and connector routing. A few minutes of preparation can prevent a misplaced plug, broken clip, or unnecessary second repair.
Removing the engine cover and electrical connectors
Remove the engine cover according to its attachment method, taking care not to pull against hoses or wiring. Locate the affected coil and release the electrical connector using its locking tab or slide mechanism. Pull on the connector body, not on the wires.
Once disconnected, lift the coil straight out unless the service procedure specifies another motion. Inspect the well before installing anything. Oil, water, debris, or a damaged boot should be dealt with rather than covered by the replacement part.
Installing the new ignition coil correctly
Compare the new coil with the old one before fitting it. Seat the boot squarely over the spark plug and press the coil down until it is fully engaged. Reconnect the electrical plug until its lock is secure, but do not force it if the alignment is wrong.
If the coil uses a retaining fastener, tighten it to the specified torque. Excessive force can damage the housing or threads, while insufficient force may allow vibration to affect the connection. Keep grease away from electrical terminals unless the service instructions specifically call for its use.
Reassembling the components and clearing fault codes
Reinstall the engine cover and any removed ducting or hardware in the reverse order. Check that every hose, connector, and clip is returned to its original position. Before clearing codes, start the engine briefly and listen for abnormal noises or a continuing severe misfire.
Once the installation appears correct, use the scanner to clear relevant codes if appropriate. Clearing a code does not repair a fault, so a light that returns should be investigated. If the original code was only pending, record the result before erasing it.
Testing the engine after installation
Let the engine idle and observe whether the vibration has improved. Then take a cautious drive that includes the conditions under which the misfire originally appeared, while monitoring for hesitation, warning lights, or reduced power. A scan after the drive can show whether misfire counts are returning.
Do not treat a quiet idle as the final proof if the original problem occurred under load. The replacement should be judged across a normal operating range, and any returning symptom should prompt another inspection of the plug, connector, wiring, and fuel or air systems.
A clear repair video can help with visual orientation, but it should not replace the torque values and access instructions for the specific engine. Procedures shown for one model may not transfer safely to another.
Audi ignition coil replacement cost and timing
The price of an Audi ignition coil replacement depends on the part, engine layout, access, and whether related maintenance is due. A single accessible coil is usually a smaller job than multiple coils on a tightly packaged engine. Local labor rates can also vary widely.
Treat online estimates as planning figures rather than promises. The final invoice may include diagnosis, spark plugs, seals, wiring repairs, or taxes. Ask the repairer to separate the diagnostic charge, parts, labor, and any recommended additional work.
Typical parts and labor price ranges
For many vehicles, an individual replacement coil may cost roughly $40 to $150 for the part, while labor may range from about $80 to $250 depending on access and shop rates. These are broad US planning ranges, not a quote for every Audi engine. Dealer pricing and specialty components can be higher.
If a scan and inspection are needed first, diagnostic labor may be billed separately. A full set of coils, spark plugs, or additional sealing work can raise the total substantially. Confirm whether the estimate includes code scanning and a post-repair test drive.
Factors that affect the total replacement cost
The number of failed coils is only one factor. The engine’s cylinder arrangement, access to the coil, condition of the spark plugs, and presence of oil or moisture can all change the job. A seized connector or damaged wiring adds time even when the coil itself is easy to reach.
The quality of the part and its warranty also affect the decision. A cheaper coil that fails quickly may cost more after repeat labor. It is sensible to compare the complete repair plan rather than choosing solely by the lowest line-item price.
How long the repair usually takes
A single accessible coil can take around 30 minutes to an hour for an experienced technician, including basic testing. More involved layouts or a complete set may take one to several hours. Diagnosis can add time when the misfire is intermittent or multiple systems are involved.
Ask whether the stated time covers only installation or also scanning, inspection, and verification. As with a Los Angeles carpet installation, the preparation and final walk-through can affect the total appointment even when the central task seems simple; for a vehicle, that means checking the cause and confirming the result.
Signs that additional ignition repairs are needed
A continuing misfire after coil replacement suggests that the diagnosis is incomplete or that another fault remains. Pay attention to recurring codes, rough running, oil in a plug well, damaged connectors, and a warning light that returns during acceleration. These signs should lead to more testing, not another blind parts purchase.
If the vehicle has several old plugs or coils, discuss a broader maintenance plan. A repair shop should be able to explain which evidence supports each added item and whether it is urgent, preventative, or simply convenient while access is available.
Preventing repeat ignition coil failures
Coils are wear components, but repeated failures usually deserve a closer look. Heat, contamination, excessive plug gap, poor connections, and charging-system problems can all shorten service life. Prevention is less about adding a special product and more about correcting the conditions that stress the ignition system.
Keep records of the coil part number, installation date, mileage, and any related repairs. That history makes future diagnosis faster and can reveal whether failures are isolated or occurring in a pattern.
Following the recommended spark plug service interval
Spark plugs should be replaced at the interval and specification listed for the vehicle’s engine. The correct heat range, thread size, and gap matter. A worn plug can require higher firing voltage, increasing the demand placed on the coil.
Do not use a generic interval when the owner’s manual or service schedule provides a more specific one. If a plug is removed during diagnosis, inspect it rather than automatically reinstalling a visibly worn or fouled component.
Protecting coils from oil and moisture contamination
Oil around a coil often points to a valve-cover or plug-well sealing problem, while moisture may enter after washing, leaks, or damaged covers. Contamination can damage the boot, encourage arcing, and create a repeat misfire even with a new coil installed.
Keep the area clean and dry during service. Do not spray liquid directly into exposed connectors, and repair the source of any leak instead of repeatedly replacing affected coils. A clean, correctly seated connector is part of the ignition repair.
Addressing overheating and electrical problems
High under-hood temperatures are part of normal operation, but excessive heat from a cooling fault, missing shield, or restricted airflow can accelerate component aging. A weak battery, alternator problem, poor ground, or damaged wiring can also create unstable electrical conditions.
If coils fail repeatedly, test the charging system and inspect grounds before buying another set. The broader lesson from SEO strategy for Google is not relevant automotive evidence, but its focus on diagnosing underlying conditions rather than chasing surface signals has a useful parallel here: find the cause, not just the code.
When to have the ignition system inspected again
Have the system checked again if a warning light returns, the engine begins hesitating, or a new misfire code appears. An inspection is also wise after an oil leak repair, overheating event, or major electrical repair. Early testing can prevent a small connector or plug issue from damaging another coil.
Keep the scan results and repair invoice together. If the symptom returns, those records help a technician compare the original cylinder, operating conditions, and replacement part instead of beginning from zero. For communications-related maintenance reminders, an RCS migration guide is a separate topic, not a substitute for vehicle service records.
Conclusion
A successful Audi ignition coil replacement starts with symptoms and evidence, then follows with correct fitment, careful installation, and a proper post-repair test. Replacing the coil may be quick, but checking the spark plug, connector, wiring, contamination, and charging system is what makes the repair more dependable. When the misfire is severe or does not follow the coil during testing, professional diagnosis is the safer next step.
Frequently Asked Questions
How long do ignition coils usually last?
There is no single lifespan for every vehicle. Heat, mileage, plug condition, oil contamination, electrical faults, and driving conditions all affect service life, so symptoms and test results matter more than a fixed replacement date.
Can I drive with a bad ignition coil?
A vehicle with a mild intermittent symptom may reach a repair shop, but continued driving is not advisable when the engine is shaking, power is reduced, or the check engine light is flashing. A severe misfire can damage emissions components.
Should I replace all ignition coils at once?
Not always. Replacing one confirmed faulty coil is reasonable when the others test well, while replacing the set may make sense when several have failed or labor access is difficult. The decision should be based on condition, mileage, and cost.
Can bad spark plugs damage an ignition coil?
Worn or incorrectly gapped plugs can demand more firing voltage, which may increase stress on a marginal coil. Checking and replacing overdue plugs can therefore be part of a lasting ignition repair.
Will a diagnostic code identify the bad coil?
A code can identify the cylinder where a misfire was detected, but it does not prove that the coil is the cause. A coil swap test, inspection, and electrical or mechanical testing may be needed for confirmation.
Is ignition coil replacement difficult for a home mechanic?
The physical replacement is often manageable for someone with the correct tools and service information. Access, connector design, torque requirements, and diagnosis create the main risks. Stop and seek professional help if parts do not release normally or the misfire persists.
What should be checked after replacing a coil?
Confirm that the connector is locked, the coil is fully seated, the engine cover and hoses are restored, and the warning light remains off. Scan for returning codes and test the vehicle under the conditions that originally produced the symptom.